📋 Overview
This guide walks you through the complete installation process for UploadsPro on Legacy Shopify themes. Legacy themes (themes created before Shopify 2.0) require a slightly different setup process but work just as well.
💡 What is a Legacy Theme?
Legacy themes are Shopify themes created before June 2021 that don't support App Blocks. They use traditional Liquid template files and may require manual theme edits for some features. Common legacy themes include Debut, Brooklyn, Minimal, and others from that era.
✅ Good News: UploadsPro automatically detects Legacy themes and simplifies the setup process. You only have 4 steps instead of 5, since App Blocks aren't needed!
🎯 The Setup Guide (Legacy Version)
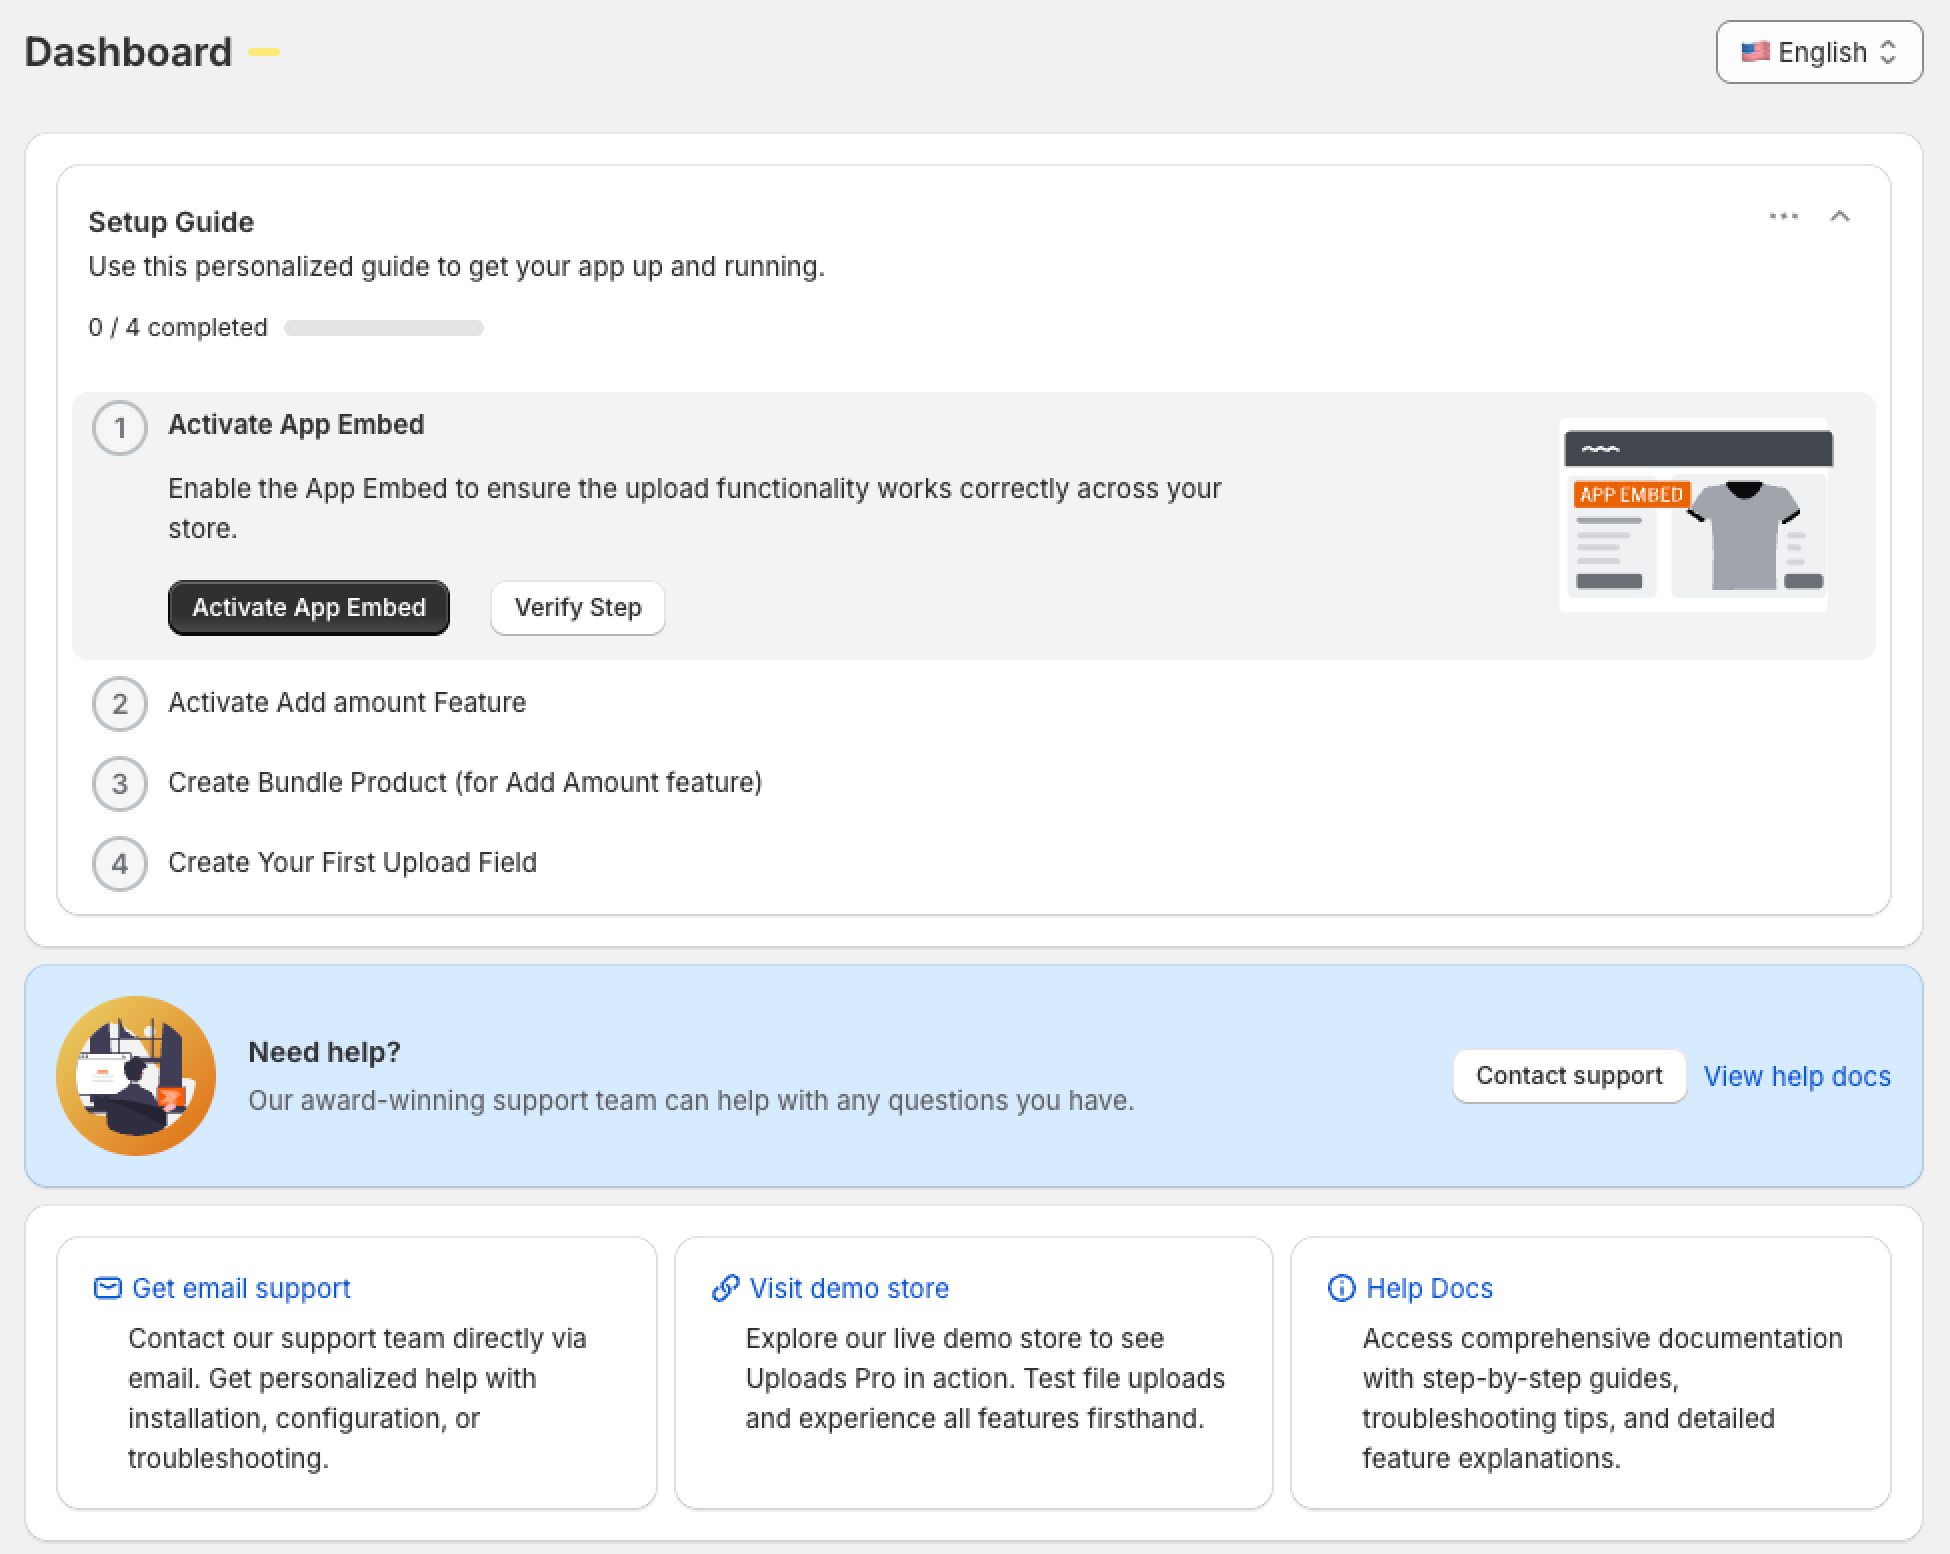
When you first open UploadsPro on a Legacy theme, you'll see a simplified Setup Guide on your dashboard with only 4 steps. The app automatically detected your theme type and adjusted the setup accordingly.
📌 Legacy Setup Guide Features:
- Simplified 4-step process (no App Block needed)
- Automatic theme type detection
- Step 1 (App Block) is skipped automatically
- Same verification system and progress tracking
Step 1: Activate App Embed (REQUIRED)
What This Does
The App Embed loads all the necessary JavaScript and CSS files for UploadsPro. On Legacy themes, this is the only installation step needed since there are no App Blocks.
⚠️ Critical Step: This is the most important step for Legacy themes. Without the App Embed enabled, upload fields will not appear or function.
How to Activate
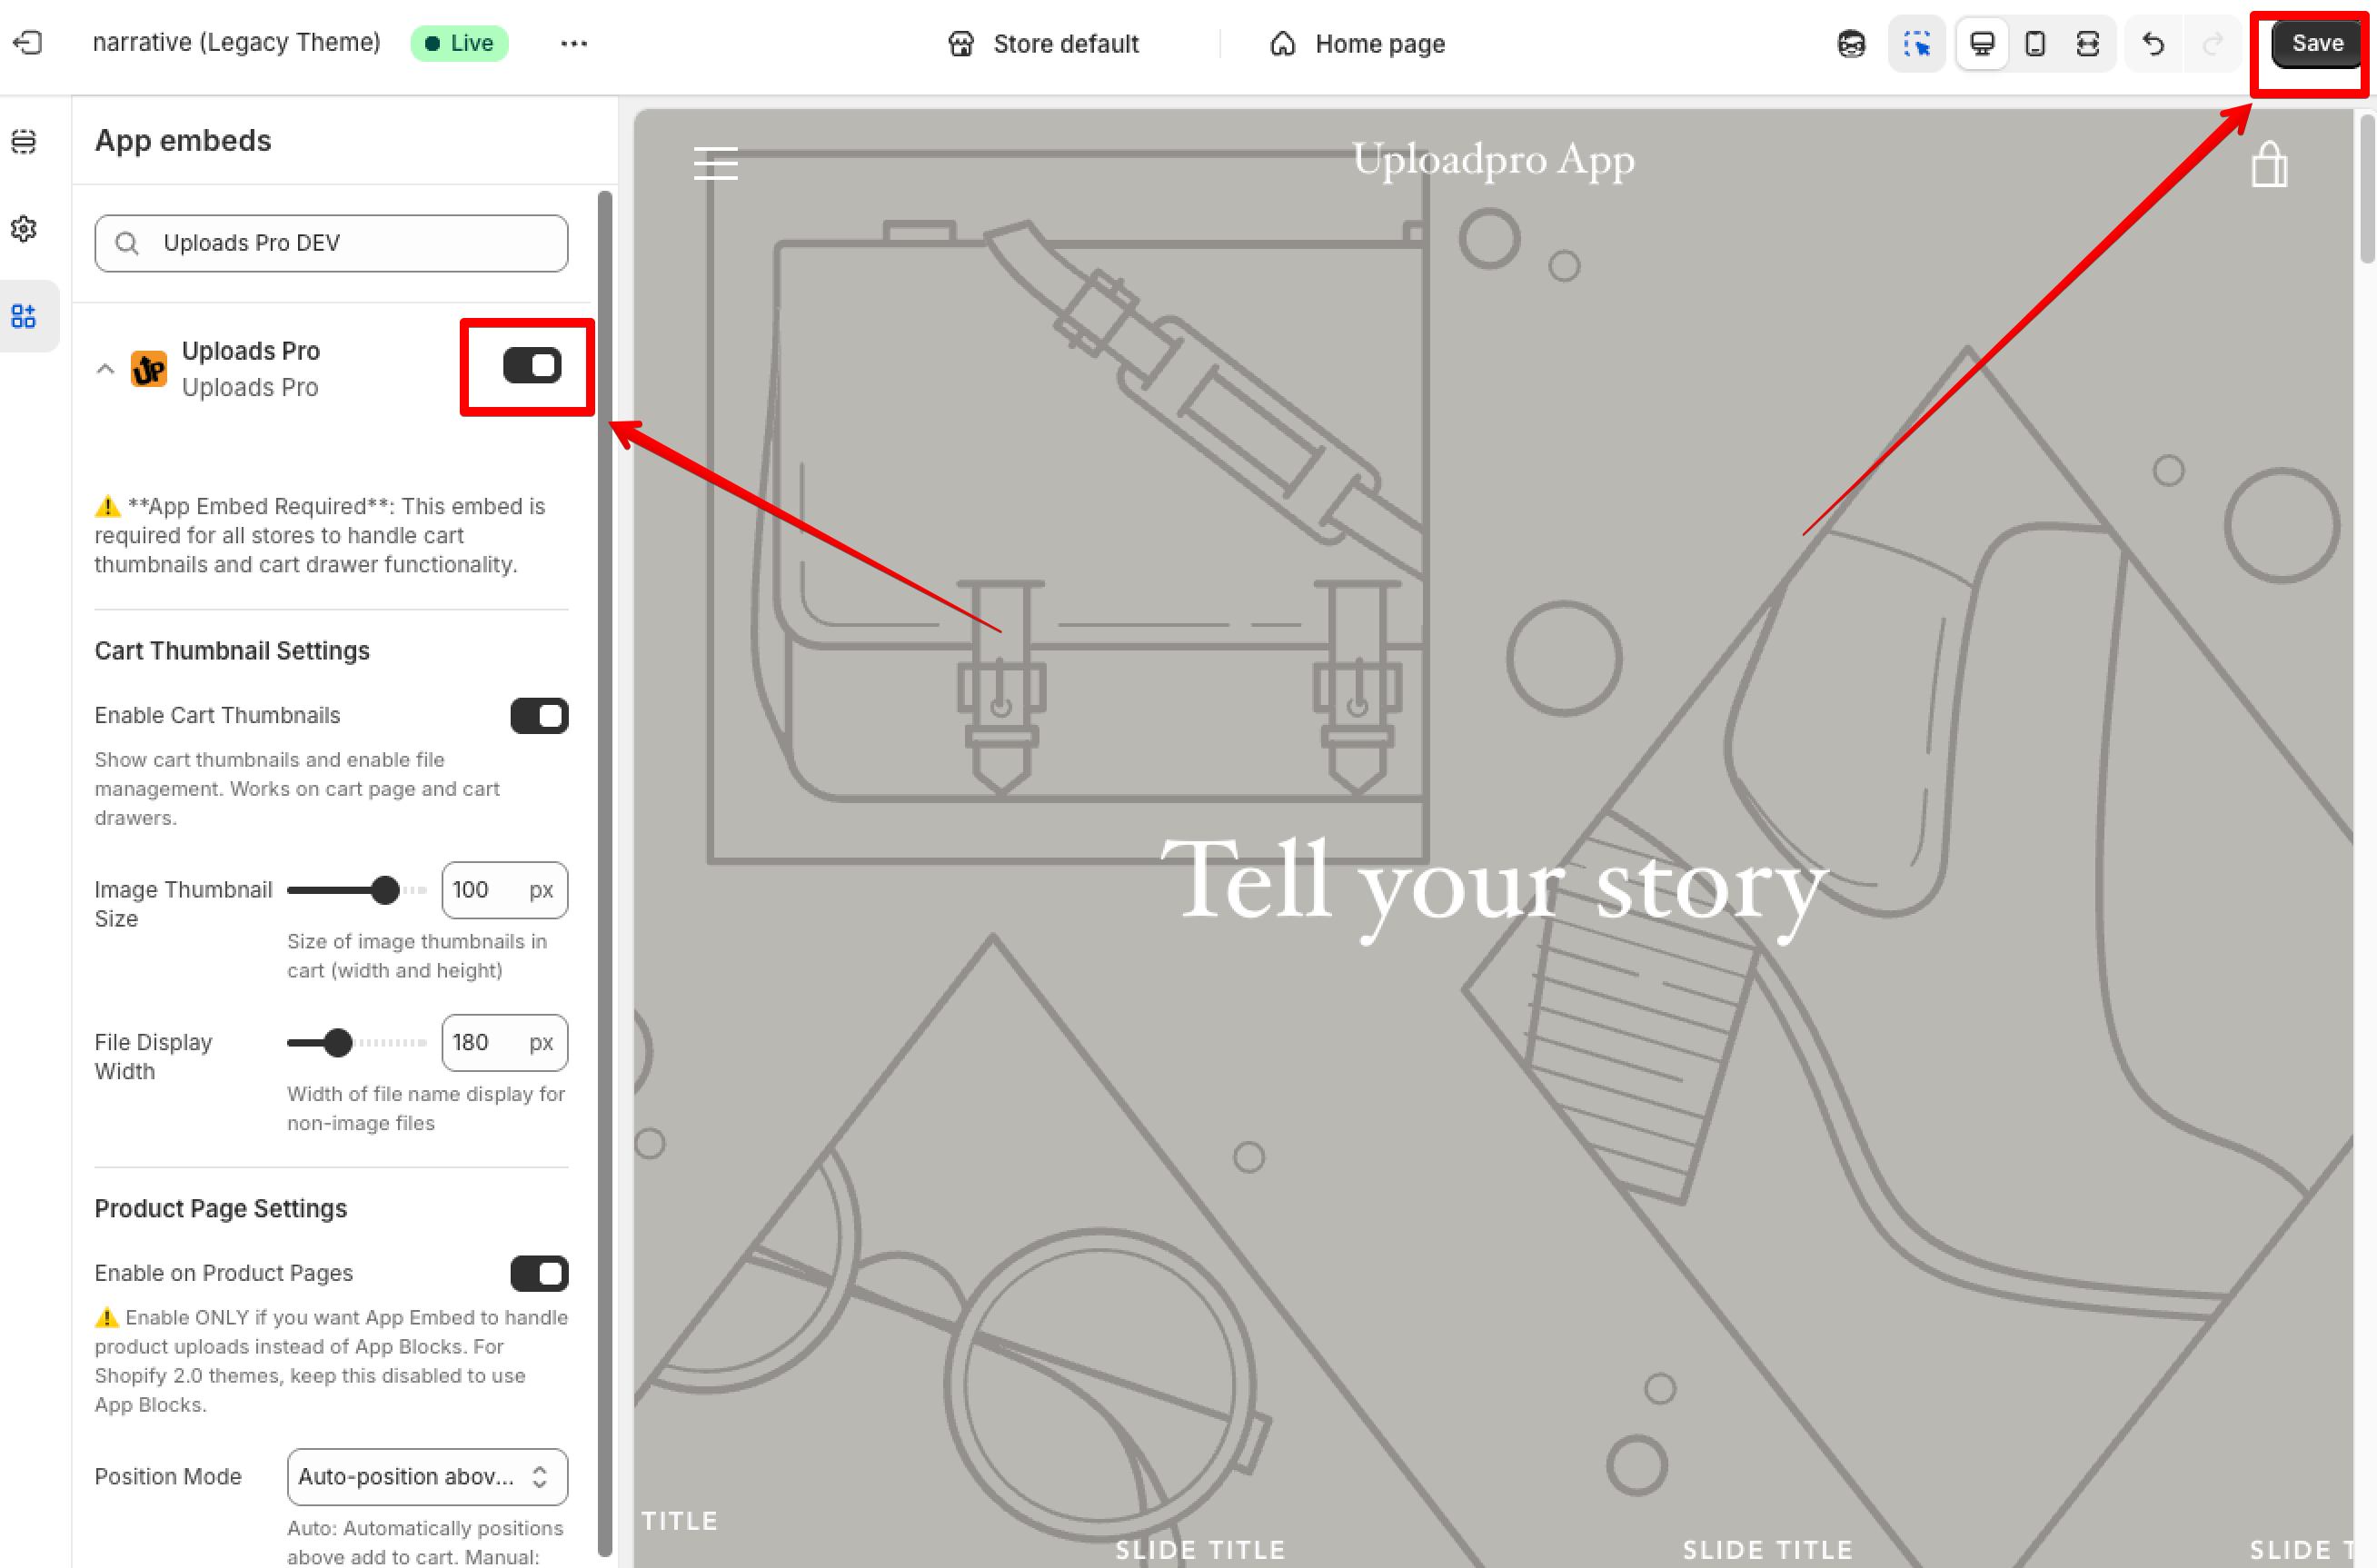
- In the Setup Guide, click the "Activate App Embed" button
- This opens the Theme Customizer
- In the left sidebar, scroll down to "App embeds" section
- Find "UploadsPro Embed" in the list
- Toggle the switch to ON (it should turn green/blue)
- Click Save in the top-right corner
Verification
Return to UploadsPro and click "Verify" in Step 1 (which corresponds to Step 2 in Shopify 2.0). If the embed is active, you'll see a green checkmark ✅.
✅ Success Indicators:
- Toggle switch shows ON (green/blue)
- Green checkmark appears on Step 1
- No errors in browser console when visiting product pages
⚠️ Troubleshooting:
- If you can't find "App embeds", ensure you're using the current theme editor (not the old code editor)
- Some very old themes may not support App Embeds - contact support if this is the case
- Make sure you're editing the published/active theme, not a draft
Step 2: Activate Add Amount Feature
What This Does
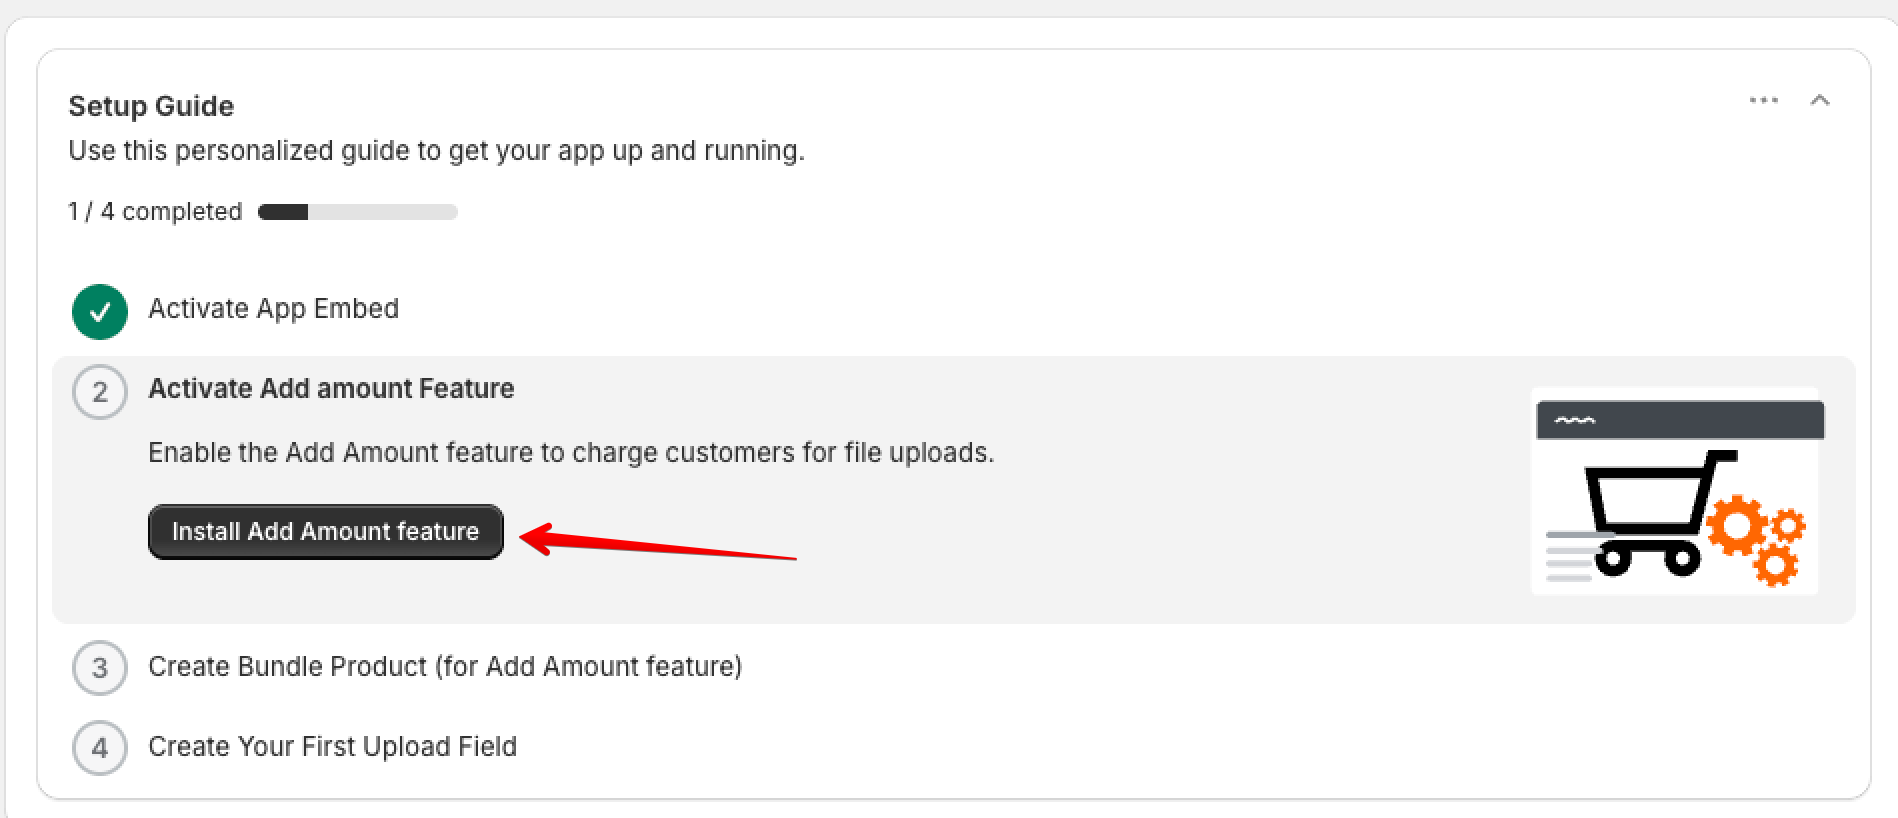
The Add Amount feature allows you to charge extra fees for file uploads. This requires installing the feature in your store.
⚠️ Professional Plan Required: This feature is only available on the Professional plan ($9.99/month or $99.99/year).
How to Install
- In the Setup Guide, click "Install Add Amount Feature"
- The app automatically installs the necessary Shopify Function
- Wait for the success message (usually 5-10 seconds)
- No additional steps are required
Verification
The step automatically marks as complete when installation succeeds. You can verify it's working by:
- Going to Shopify Admin → Settings → Checkout
- Scrolling to Cart and checkout validations
- You should see "UploadsPro function" in the list
💡 Skip This Step: If you don't plan to charge for uploads, you can skip this step. It can be installed later if needed.
Step 3: Create Bundle Product
What This Does
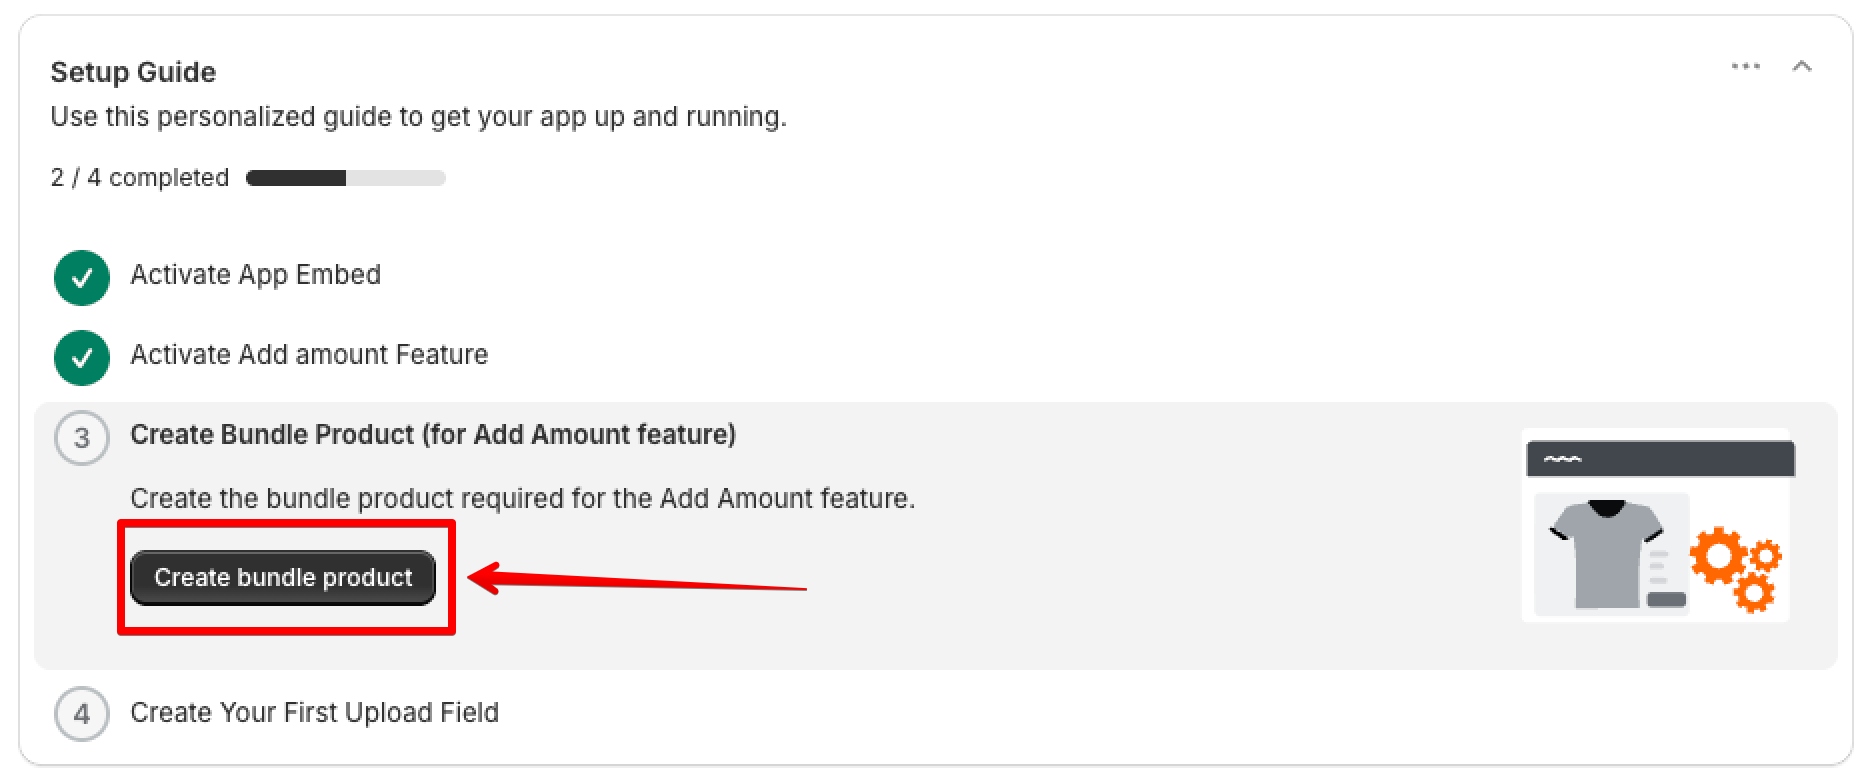
Creates a hidden product used by the Add Amount feature to add fees to the cart. This product is never shown in your catalog.
⚠️ Only Required for Add Amount: Skip this step if you're not using the Add Amount feature.
How to Create
- In the Setup Guide, click "Create Bundle Product"
- The app automatically creates the product with correct settings
- Wait for the success message
- The product is automatically hidden from your online store
Verification
The step automatically marks as complete. You can verify by:
- Going to Products in Shopify Admin
- Searching for "UploadsPro - Fee Bundle"
- The product should exist with "Online Store" sales channel disabled
⚠️ Don't Delete: Never delete this product if you're using Add Amount. The feature won't work without it.
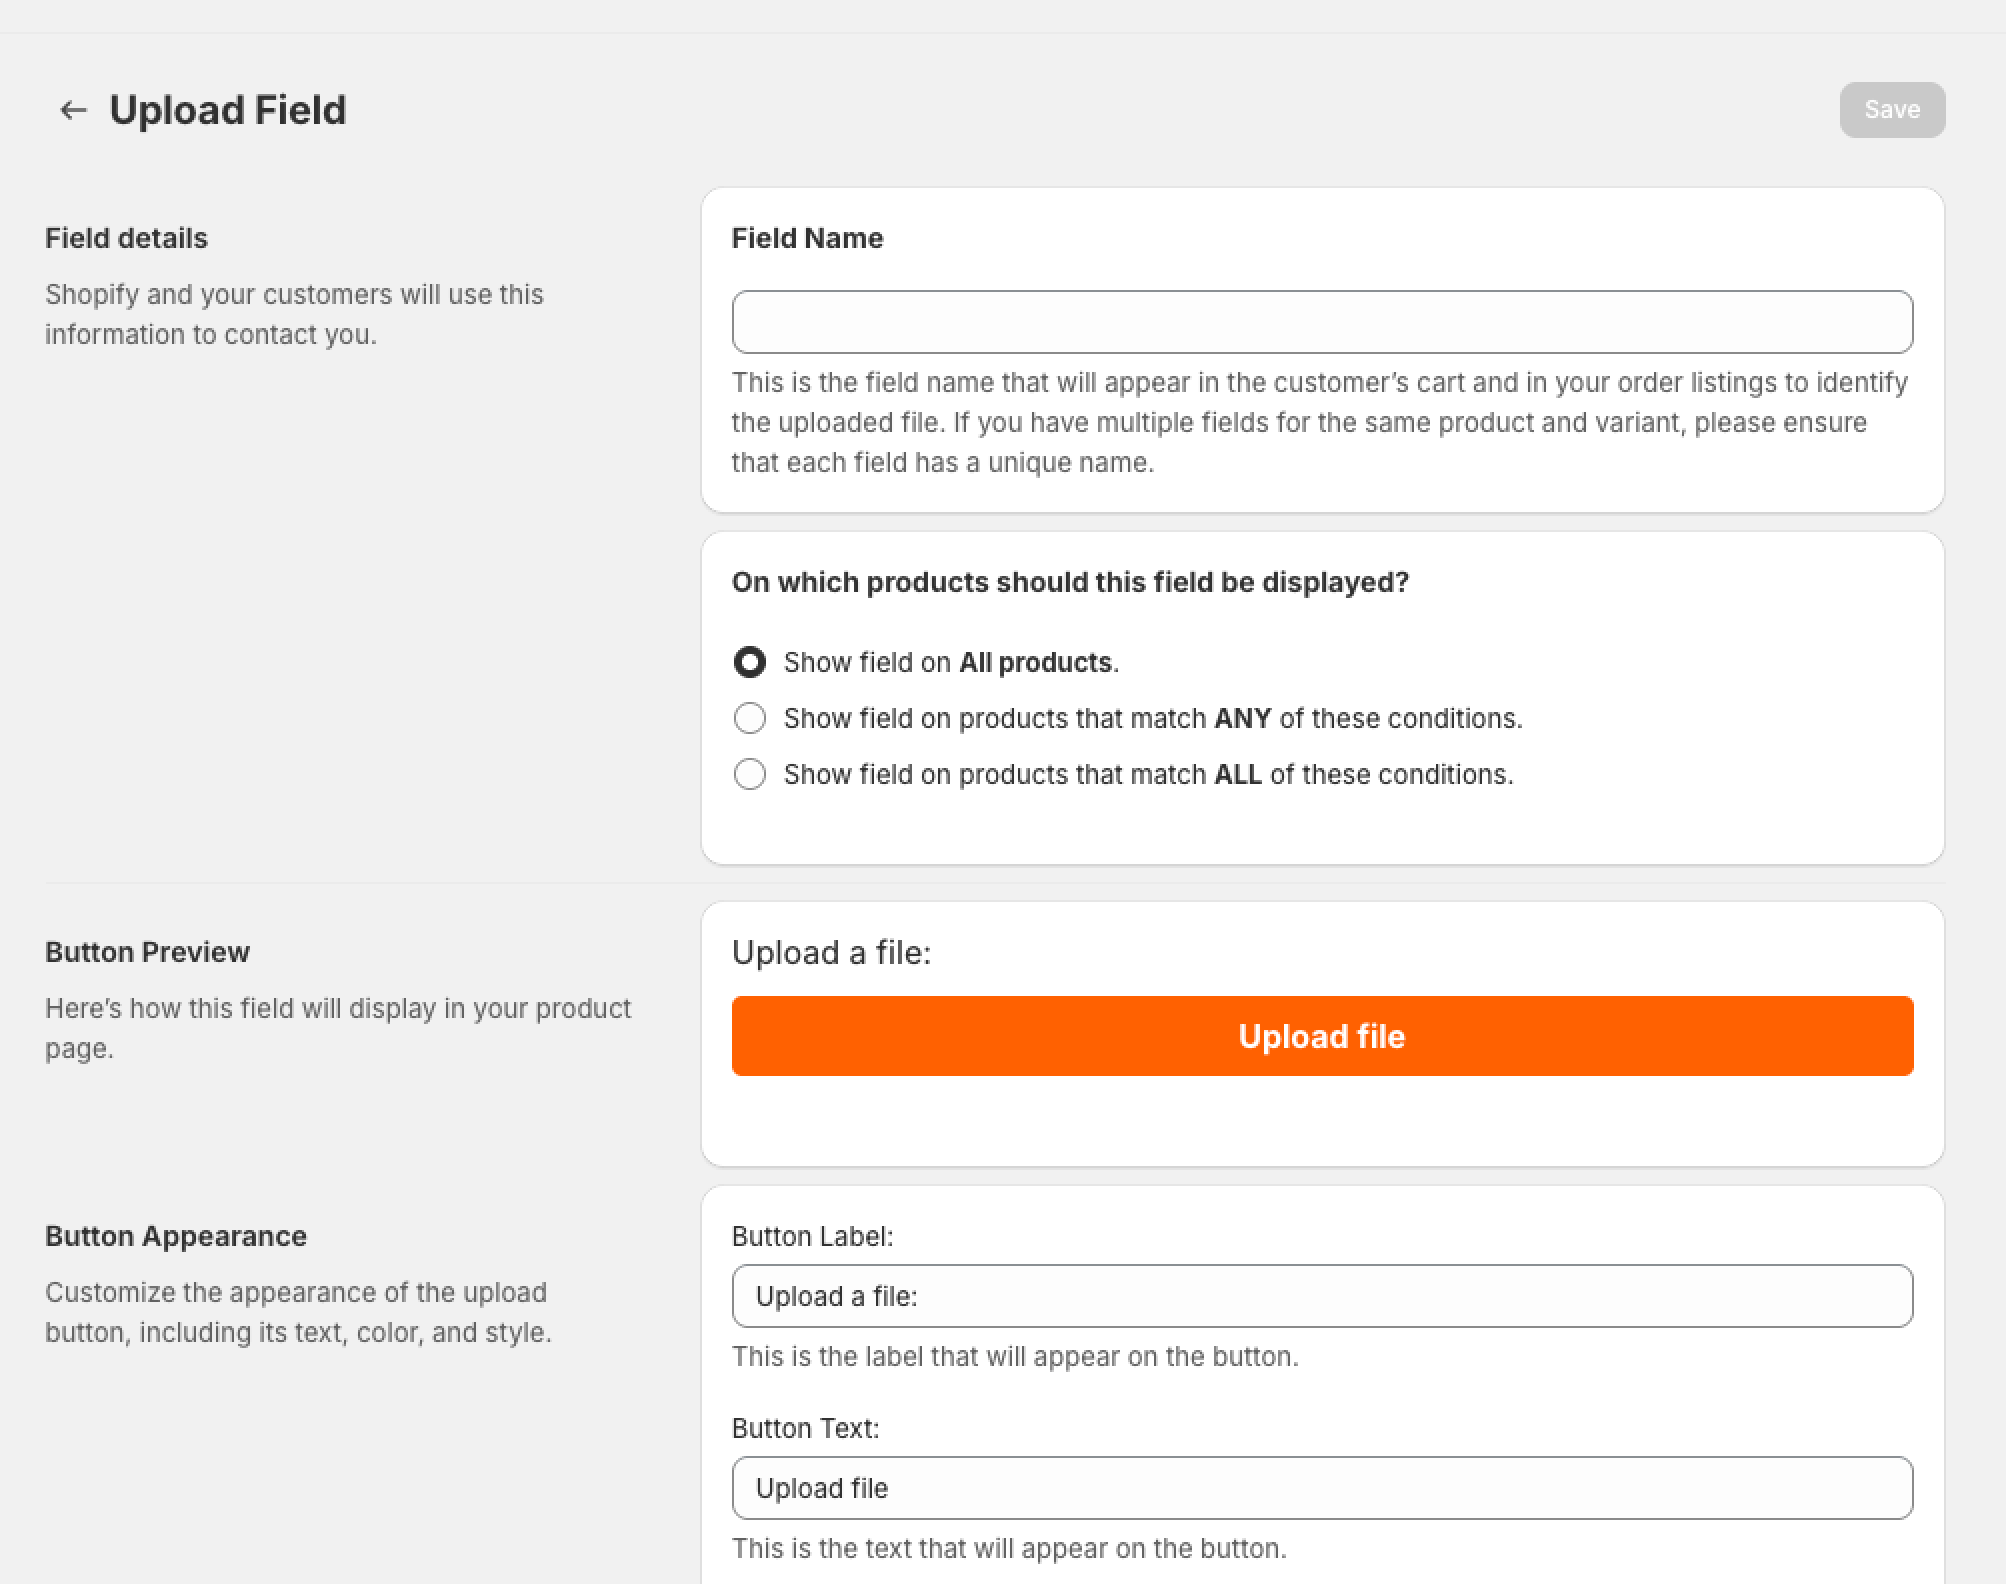
Step 5: Create Your First Upload Field
What This Does
Upload Fields define where and how customers can upload files. You need at least one field to start accepting uploads.
How to Create
- In the Setup Guide, click "Create First Field"
- You'll be taken to the Field Editor
- Configure the field settings in the page.
- Click Save Field
Verification
After saving your field:
- Visit a product page that matches your field's targeting rules
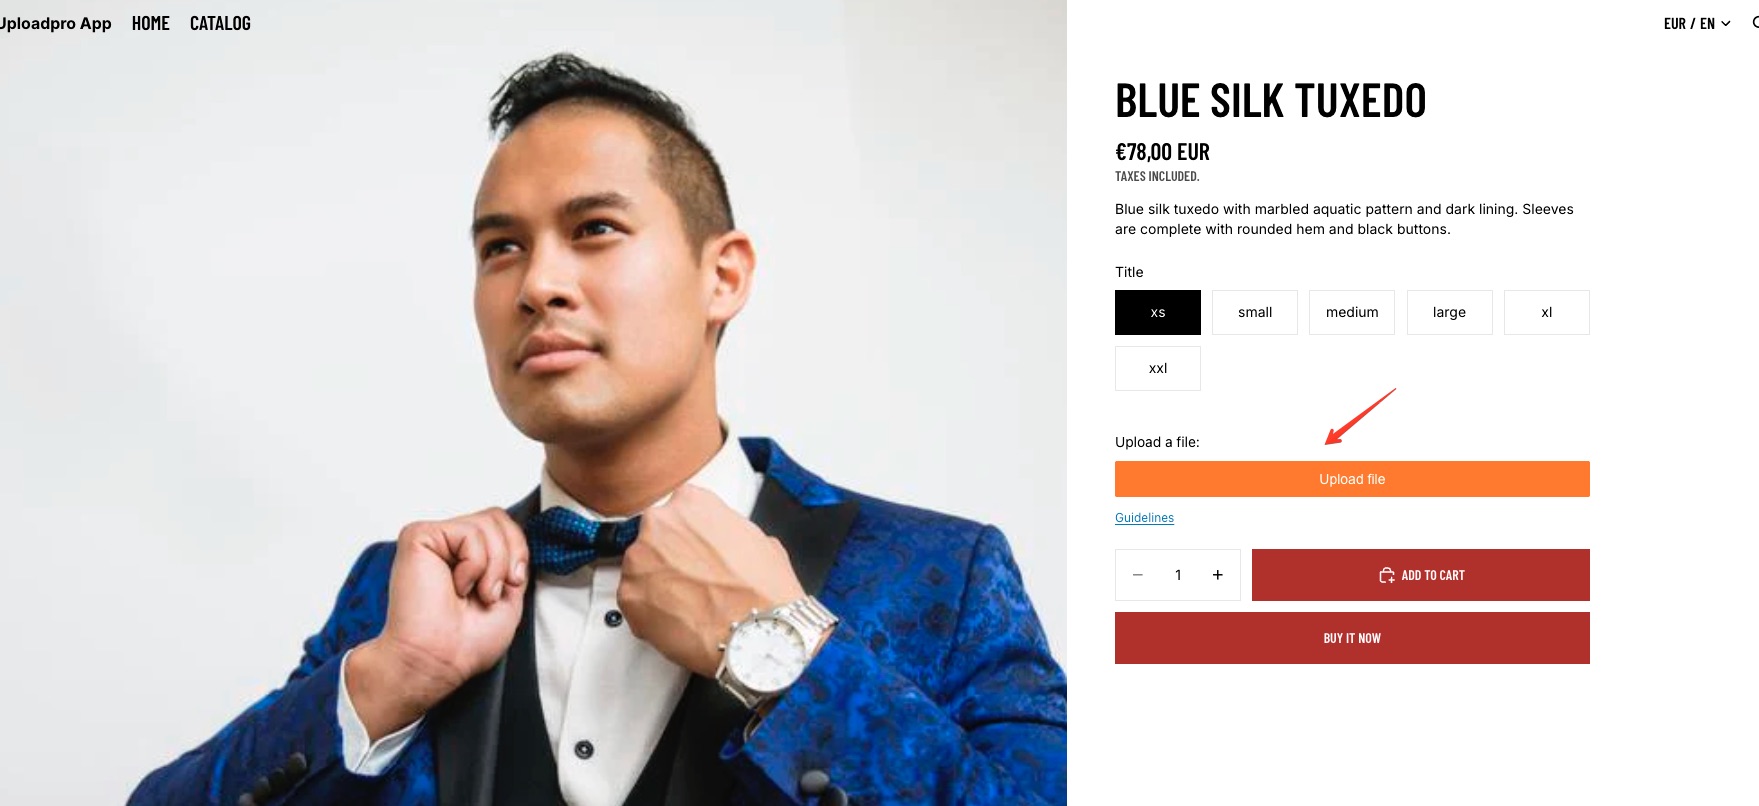
- You should see the upload button/field appear on the product page
- Test uploading a file to confirm it works
- Return to the Setup Guide and click "Verify"
✅ Success Indicators:
- Upload button appears on product pages
- You can select and upload files
- Green checkmark appears on Step 4
- Setup Guide shows as completed
📍 Field Positioning on Legacy Themes
Auto-Positioning
By default, UploadsPro attempts to automatically position upload fields on your product pages. The app looks for common selectors like the Add to Cart button and positions fields nearby.
💡 How Auto-Positioning Works:
- App scans the product page for the Add to Cart form
- Upload fields are inserted before the Add to Cart button
- Works with most Legacy themes automatically
- No theme code editing required
When Auto-Positioning Doesn't Work
Some Legacy themes have unique structures that prevent auto-positioning from working correctly. Signs of this include:
- Upload fields not appearing at all
- Upload fields in the wrong location (header, footer, etc.)
- Upload fields appearing multiple times
- Layout breaking when fields appear
Manual Positioning (Solution)
If auto-positioning doesn't work, you can use Manual Positioning Mode:
- Go to Theme Customizer → App embeds → "UploadsPro"
- In the settings, find "Position Mode"
- Select "Manual positioning with snippet"
- Follow the Manual Positioning Guide to add the code snippet to your theme
✅ Manual Mode Benefits:
- Complete control over field placement
- Works with any theme structure
- Simple code snippet (no complex editing)
- Can be positioned anywhere on the page
For detailed instructions, see the Manual Positioning Mode Tutorial.
✅ Completing the Setup
Required Steps (Mandatory)
These steps must be completed for the app to work on Legacy themes:
- ✅ Step 1: Activate App Embed
- ✅ Step 4: Create Your First Upload Field
Optional Steps
These steps are only needed if using the Add Amount feature:
- ⭐ Step 2: Activate Add Amount Feature
- ⭐ Step 3: Create Bundle Product
Dismissing the Setup Guide
Once you've completed the required steps (Steps 1 and 4), you can dismiss the Setup Guide by clicking the "Dismiss Guide" button. The dashboard content will then become visible.
💡 Setup Guide Behavior:
- The guide stays visible until required steps are complete
- You can dismiss it early, but it may reappear on next visit
- Once dismissed after completing steps, it won't show again
- Dashboard content appears after required steps are done
🔧 Troubleshooting Legacy Theme Setup
Upload Fields Not Appearing
- Check App Embed: Ensure it's enabled in Theme Customizer → App embeds
- Verify Field Targeting: Confirm the field's product targeting matches the product you're testing
- Clear Cache: Hard refresh (Ctrl+F5 / Cmd+Shift+R) or test in incognito mode
- Check Console: Open browser console (F12) and look for errors
- Try Manual Mode: Switch to Manual Positioning if auto-positioning fails
Fields in Wrong Location
- Your theme likely has a non-standard structure
- Switch to Manual Positioning Mode
- Add the code snippet exactly where you want fields to appear
App Embed Not Available
- Very old themes (pre-2018) may not support App Embeds
- Update to a more recent theme version if available
- Contact support for legacy theme manual installation
Theme Editor Issues
- Use the Theme Customizer (not the old code editor)
- Access from: Online Store → Themes → Customize
- Ensure you're editing the active/published theme
Upload Not Working
- Check that files meet size/type requirements
- Verify App Embed is enabled and saved
- Test with different file types and sizes
- Check browser console for JavaScript errors
After Theme Update
If you update your theme:
- Re-verify that App Embed is still enabled
- If using Manual Positioning, re-add the code snippet
- Test upload fields on product pages
- Check that field styling hasn't changed
🆙 Upgrading to Shopify 2.0
If you upgrade your theme to a Shopify 2.0 compatible version:
- The app will automatically detect the new theme type
- Setup steps will be reset
- You'll see the full 5-step Setup Guide for Shopify 2.0
- Follow the Shopify 2.0 Installation Guide
- Your existing fields and settings will be preserved
✅ Benefits of Upgrading:
- Easier installation with App Blocks
- No theme code editing needed
- Automatic updates with theme changes
- Better positioning control
📦 Complete Your Setup: Order App Block
Don't forget to set up the Order App Block to view uploaded files directly in your Shopify admin order pages!
✨ Recommended Next Step
The Order App Block allows you and your team to view and download customer uploaded files directly from the order detail page in your Shopify admin - no need to open the UploadsPro app separately.
👉 View Order App Block Installation Guide
Why install the Order App Block?
- ✅ Access uploaded files without leaving the order page
- ✅ See product images, variants, and file type icons
- ✅ View customer notes left on files
- ✅ Streamline your order fulfillment workflow
📚 Next Steps
After completing setup, explore these guides:
🆘 Need Help?
Legacy themes can have unique quirks. If you're stuck:
- 📧 Contact our support team from the app
- 📖 Review the Troubleshooting Guide
- 💬 We're experienced with Legacy themes and can help with custom implementations
- 🔧 We can provide theme-specific installation instructions if needed
💡 Support Tip: When contacting support about Legacy theme issues, mention:
- Your theme name and version
- Whether you've tried Manual Positioning
- Any console errors you see
- Screenshots of the issue
 UPLOADS PRO